Upgrading Embedded Xinu for the Multi-Core Raspberry Pi 3
Researchers: Tom Lazar, Patrick J. McGee, Rade Latinovich and Priya Bansal
Mentor: Dr. Dennis Brylow
Contents
Abstract
As computer platforms become more advanced, there is an escalating need to teach the complex concepts which they are capable of executing. This paper addresses one such need by presenting XinuPi3, a port of the lightweight instructional operating system {\em Embedded Xinu} to the Raspberry Pi 3. The Raspberry Pi 3 improves upon previous generations of inexpensive, credit card-sized computers by including a quad-core, ARM-based processor, opening the door for educators to demonstrate essential aspects of modern computing like inter-core communication and genuine concurrency.
Embedded Xinu has proven to be an effective teaching tool for demonstrating low-level concepts on single-core platforms, and it is currently used to teach a range of systems courses at multiple universities. As of this writing, no other bare metal educational operating system supports multicore computing. XinuPi3 provides a suitable learning environment for beginners on genuinely concurrent hardware. This paper provides an overview of the key features of the XinuPi3 system, as well as the novel embedded system education experiences it makes possible.
Background && Motivation
The Embedded Xinu infrastructure is a simple operating system designed to introduce students to many low-level computing concepts, including Driver Creation, Exception and Interrupt Handling, and much more. Many universities, such as Purdue University, University at Buffalo, and University of Mississippi, have created Xinu Labs. These are classrooms running Xinu on multiple embedded devices (either Raspberry Pis or Linksys Routers). Marquette University uses one such Xinu Lab to teach its Operating Systems course among other computing courses.
Using information obtained from past studies, we expand on the current Xinu infrastructure. One of the main goals of this project is to modify Xinu to run on new multi-core Raspberry Pi 3s while still maintaining support for previous platforms. Another goal of this project is to create structures within Xinu which effectively and efficiently use multiple cores.
Milestones
Understanding the Pi 3 |
In order to begin porting Xinu onto the new architecture of the Raspberry Pi 3, we first needed to understand the fundamental differences between the Pi 3 and its simpler predecessor, the Pi 1 (which currently runs Xinu in Marquette's Systems Lab). Here is a table of distinctions between the two:
| RPi 1 (Model B) | RPi 3 | |
| CPU | ARM 1176JZF-S | ARM Cortex-A53 |
| Architecture | ARMv6 (32-bit) | ARMv8 (64-bit) |
| Cores | One | Four |
| Registers | 16 | 32 |
| RAM | 512MB | 1GB |
| SoC | BCM2835 | BCM2837 |
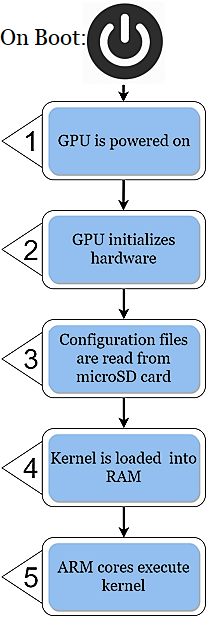
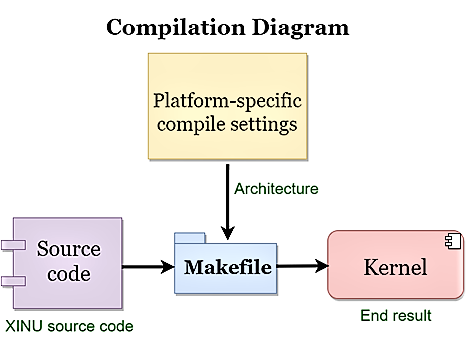
Unfortunately, the documentation for the Raspberry Pi 3's System on Chip is sparse. However, deeper digging yielded more knowledge on how past Raspberry Pi systems have worked. With such information, it is safe to infer that the Pi 3's SoC is most likely similar to that of its predecessors. Below is a diagram of the Pi's boot order and compilation:
Hello World Pt. 1: Bare Metal LED Program |
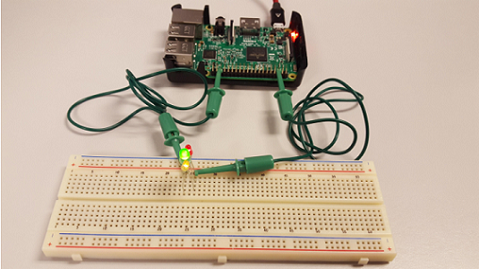
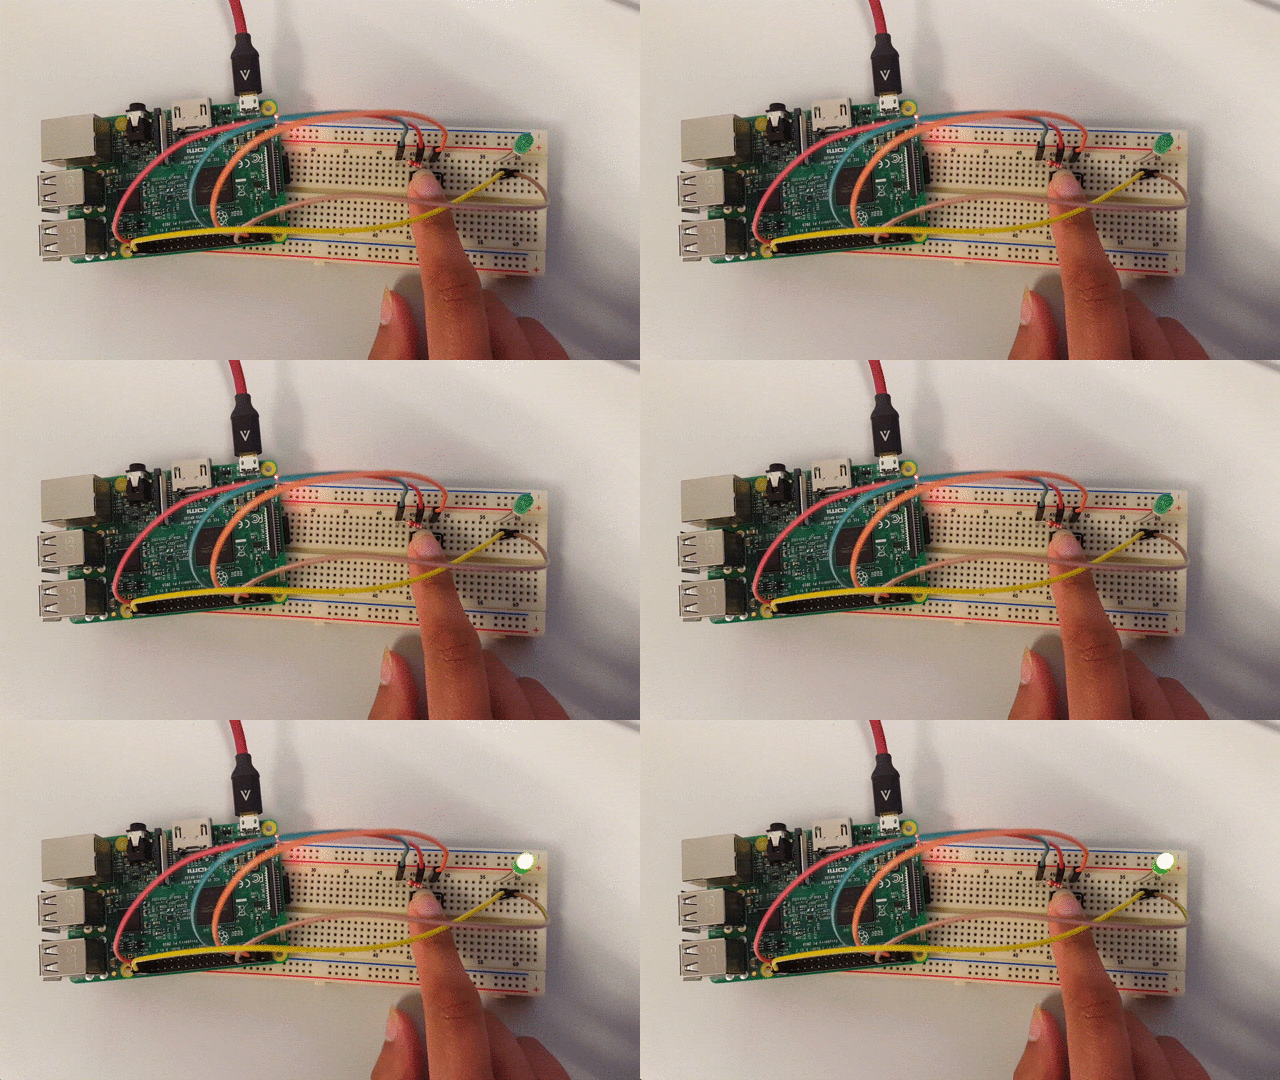
- Got a bare metal program to run on our Raspberry Pi 3
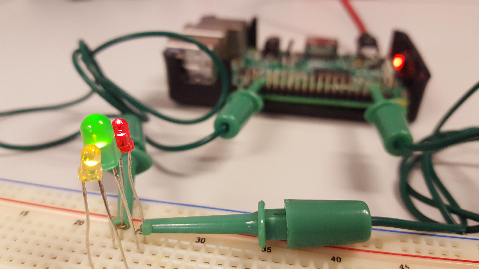
- - Using our own C program: Turned on an LED light using GPIO pin 16 on our Pi
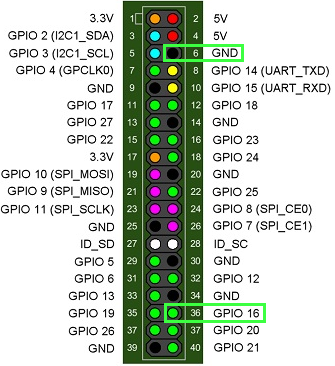
- - Reprocessed our C code into ARM64 Assembly code, and used it to turn on an LED using the same pins as before.
Hello World Pt. 2: Utilizing the Serial Port |
There are two UARTs on the Raspberry Pi 3: the mini UART and the PL011. The mini UART is used for Linux console output. The PL011 is generally more reliable and more versatile than the mini UART, mainly because the mini UART has a direct baud rate link to the Pi 3's Graphics Processor (VPU) clock speed. Contrasting the two UARTs:
| Mini UART | PL011 | |
| Break detection | ✘ | ✔ |
| Framing errors detection | ✘ | ✔ |
| Parity bit | ✘ | ✔ |
| Large FIFOs | ✘ | ✔ |
| Flow control | ✘ | ✔ |
Mini UART
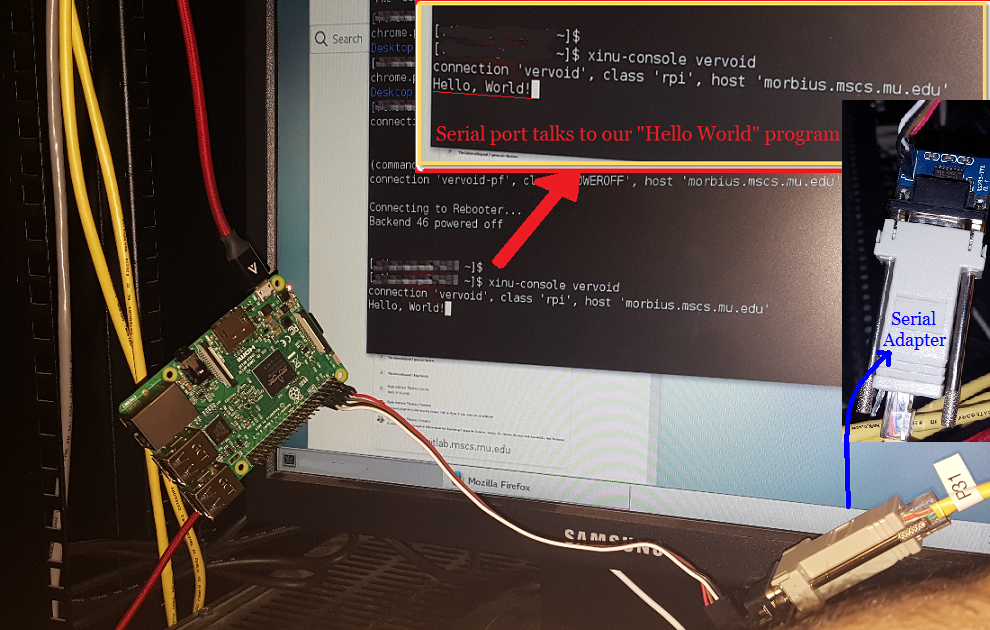
- Our team created a "hello world" C program by sending a string using Xinu's puts() function. After initializing the serial pins within the program, we connected the R232 serial adapter from a computer (via ethernet) to our Pi 3's Mini-UART GPIO pins (pins 14 and 15) using a baud rate of 115200, which yielded a response in the console.
PL011
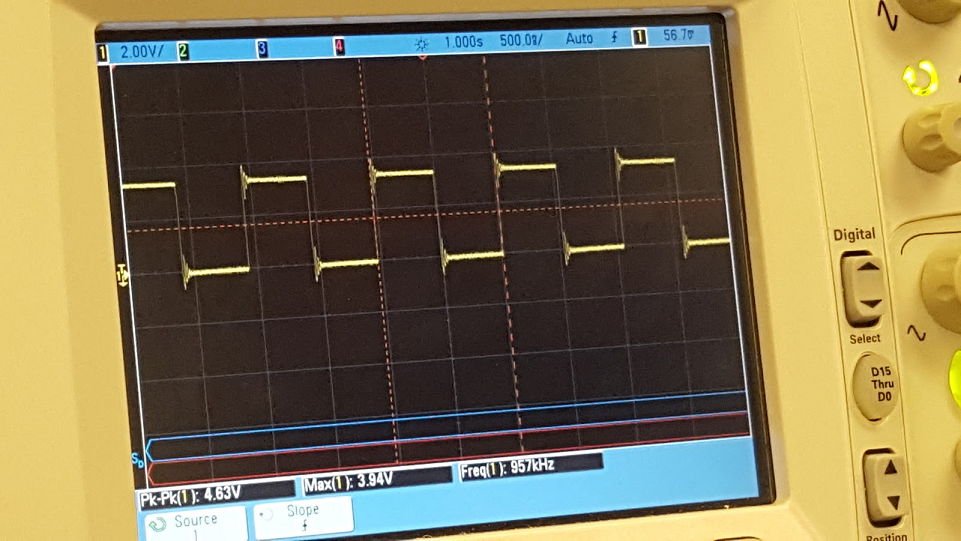
Getting the PL011 UART to respond was a challenge. Firstly, we enabled the PL011 register in our "hello world" program, and assigned the same baud rate of 115200 to it. Unfortunately, this yielded garbage output. If we know the UART clock frequency, we can calculate the baud rate. To determine reference frequency used by the PL011, we used an oscilloscope and performed the following steps:
- Enabled GPIO pin 4 and programmed it to its ALT0 function. This outputs the clock manager reference frequency at that pin.
- Plugged in our oscilloscope probe to GPIO pin 4 and read its frequency. In its latest firmware, the Raspberry Pi 3 has a 48MHz UART frequency.
- Back to our C program: with a programmed divisor of 48MHz (to be used in the baud rate calculation), and TX/RX pins set to be enabled, the computer received a "hello world" from the PL011 UART.
Porting Xinu Pt. 1: Send/Recv with UART |
Now that necessary measures have been taken to utilize the serial port and understand low-level, bare metal programming with the Pi 3, we can begin upgrading and porting the full research version of Embedded Xinu. Before jumping into the full research version, a good place to start testing is the "lite" educational version of Xinu.
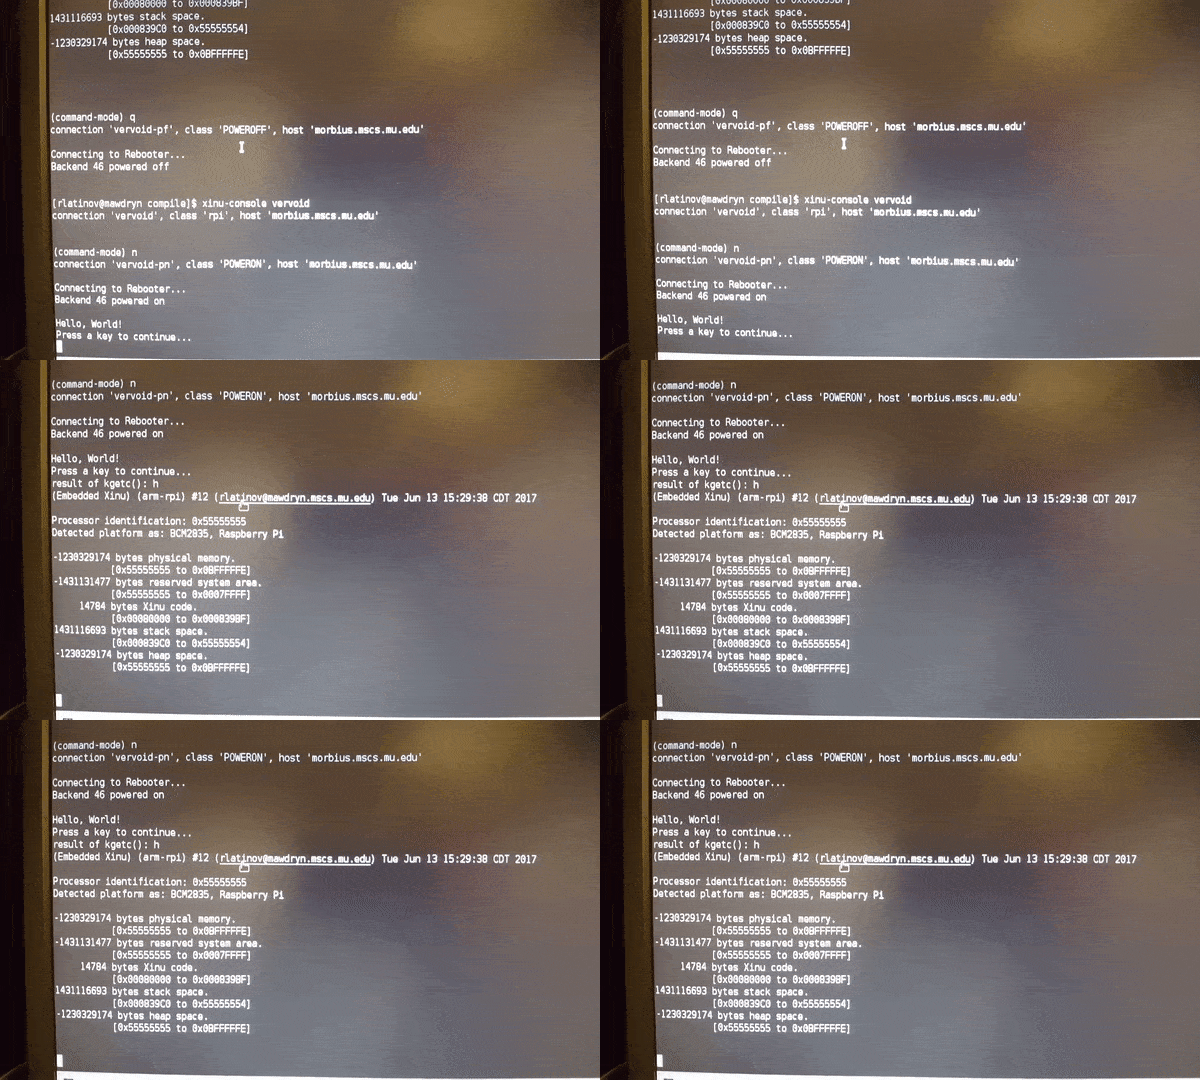
Demo of kgetc() working in Xinu "Lite" and Full versions:
Xinu says hello! Our team configured Xinu function kgetc() to be used with our working UART. The program waits for a key to be pressed (checking the PL011 flag register's FIFO), and then echoes the output back. In this example, the user entered the character "h":
Remaining updates
- ATAGS are passed and memory amount is fixed using fixup.dat.
- Core 0 executes processes with or without preemption. Context switch works (must be in system mode).
- Cores begin in a parked state. We unparked them and have working concurrency. See our GitHub Repository
- Mutual exclusion being worked on with atomic instructions. Unknown issues regarding cache setup and MMU.